
My sneakbox rebuild *TUTORIAL*
+4
RickC
Russell Vrhovac
Davey Welsh
Chris S.
8 posters
Page 1 of 1

My sneakbox rebuild *TUTORIAL*
![]() Chris S. Wed Aug 15, 2012 6:22 pm
Chris S. Wed Aug 15, 2012 6:22 pm
I told Davey that I would do a tutorial on my sneakbox rebuild to add some content to the main site.
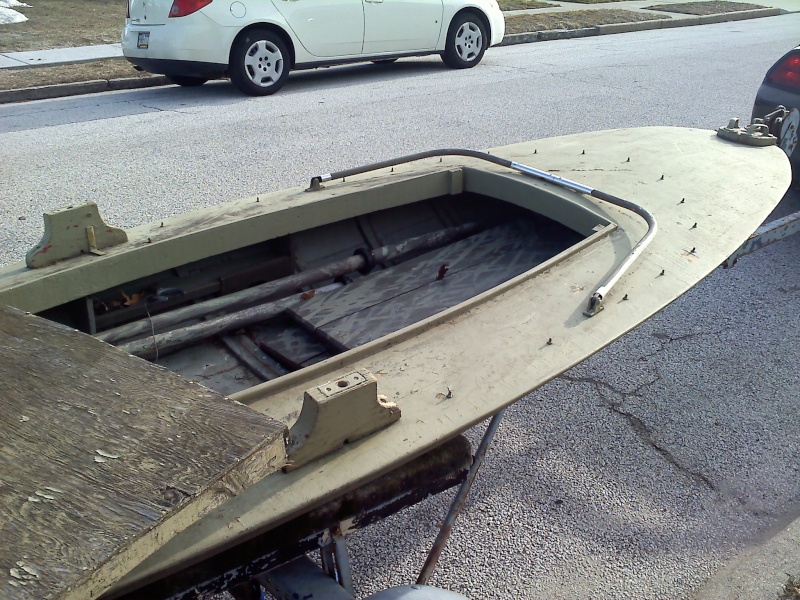
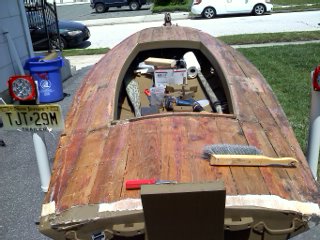
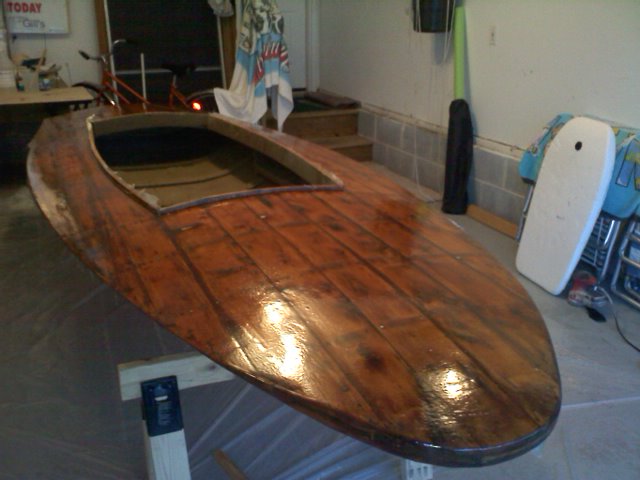
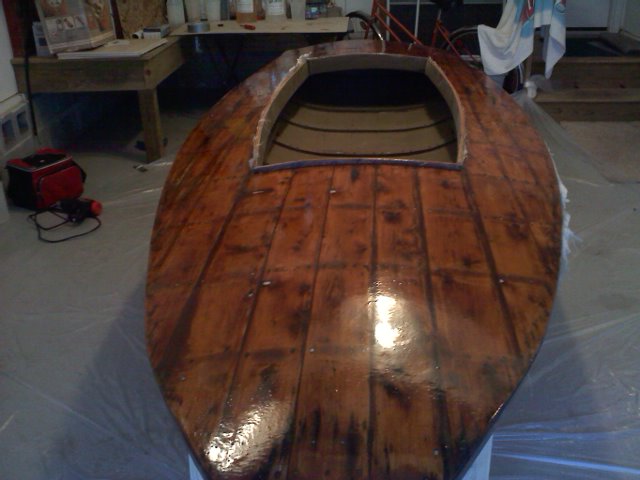
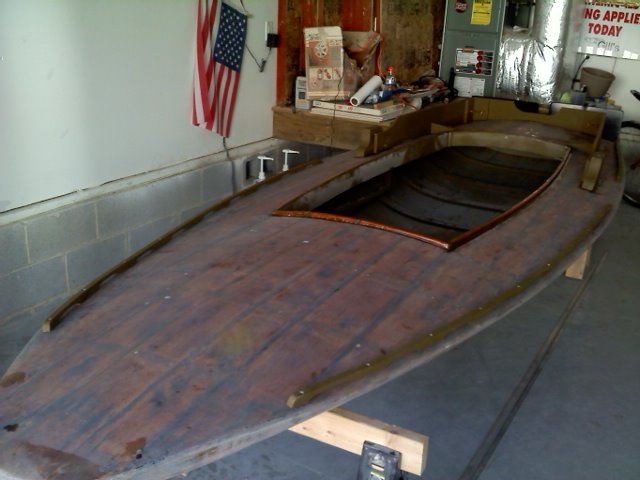
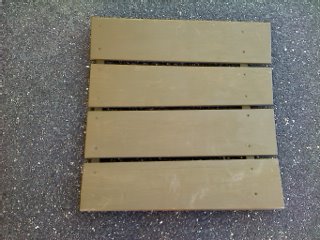
I had spent a good bit of time looking for the right sneakbox that I wanted to rebuild. I picked this one because it was a classic Barnegat Bay Sneakbox and had a large cockpit and didn't have any wood rot. Here are a few pictures of what the sneakbox looked like when I brought it home
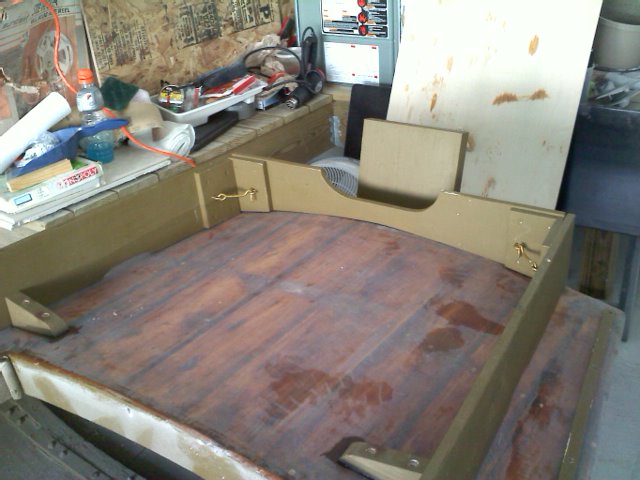
In this picture you can see that the box was in rough shape. It had that ugly block on the bow. It was painted bright red at one time you can see this on the far oarlock as the paint is chipping and red is showing through.
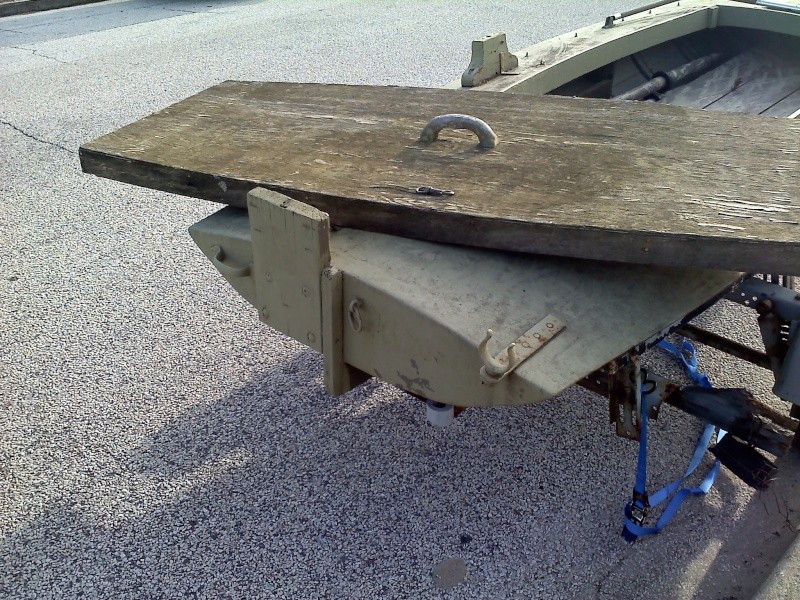
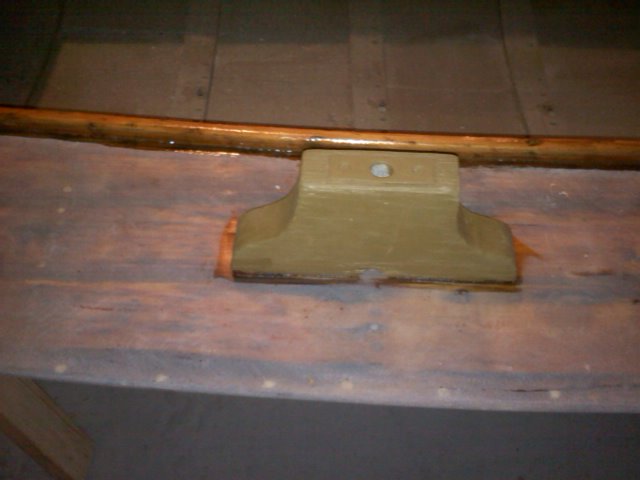
In this picture you can see that the motorboard was offset to one side. It wasn't set up as a sailer so I am not sure why it was off set. This was something I wanted to change for sure.
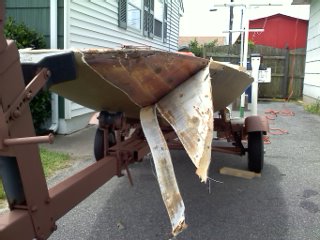
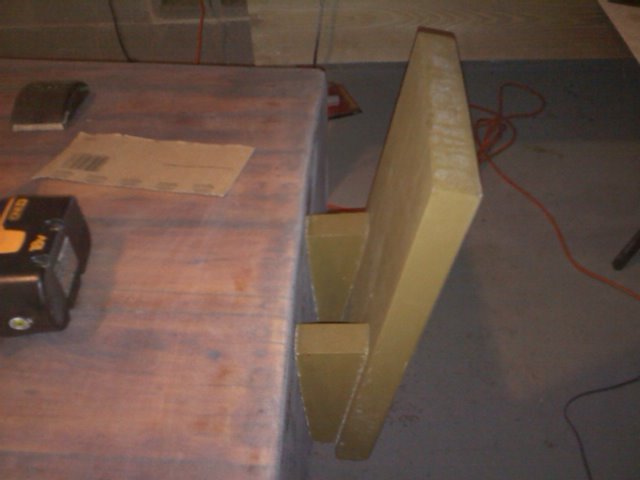
At first I was going to just paint and do minor repairs and hunt it that way the first season then reglass. so I changed the motorboard and painted it a marsh grass color. As time went on the glass was delaminating more in bigger spots and didn't wanna hunt the sneakbox this way.
At this point I knew it was time to dig in and get started I knew I wanted to reglass the whole sneakbox. It was glassed with polyester resin and poly resin doesn't stick to wood very well. The glass had started to delaminate in some spots. I wanted to reglass with epoxy and glass cloth. I started to remove the old glass with a razor knife by slicing the glass and pulling it off with vise grips. In this picture you can see the glass I pulled off the back deck.
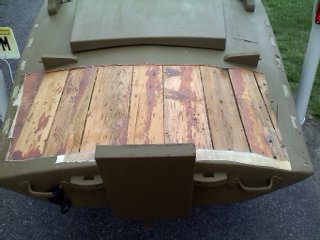
Here you can see the glass coming off in big chunks. It was crazy how easy the old poly resin and glass pulled off. some places were harder to remover the glass like around corners and where the glass and cloth was overlaped. For this I found a heat gun and a 5 in 1 scraper worked best. Don't be afraid of gouging or dinging the wood as sanding and fairing will fill in these spots.
Next was to sand off all the residue left from the resin and sand down to good clean wood. sanding is by far the suckiest and most time comsuming part of a wood boat rebuild. I used a random orbital sander and a belt sander for that hard spots.
Removing the old ice runners was a little hard as they were through bolted and glassed over. When I got them off it was time for more sanding.
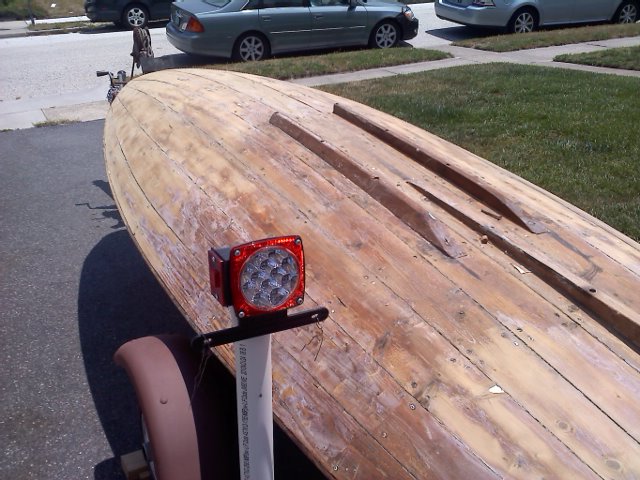
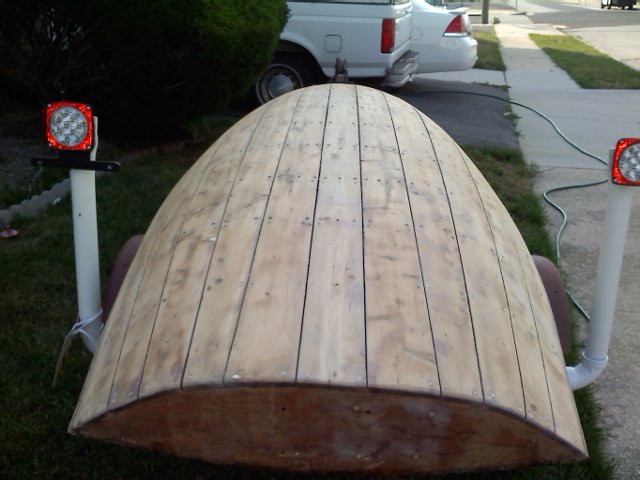
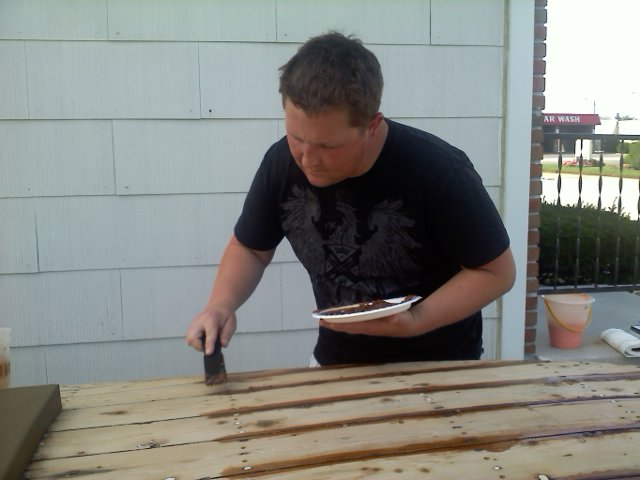
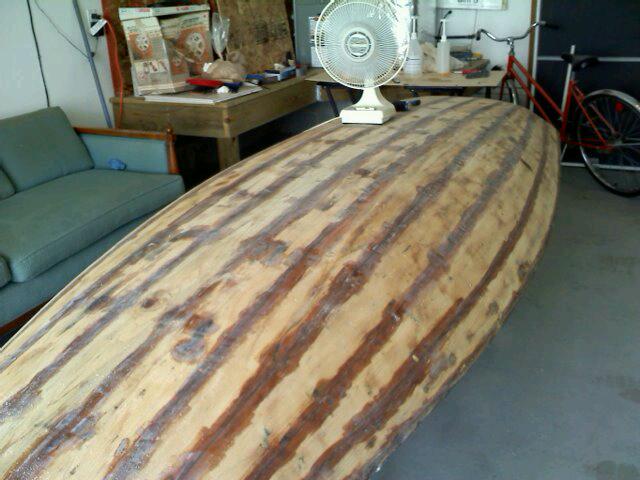
These pictures you can see the boat is all sanded down to nice clean wood and ready for all the gaps to be filled with an epoxy and wood flour mix. I would mix this to a peanut butter thickness so it will not run. I would use a paper plate to hold the mix while I would fill the gaps in the planks.
Anytime you are gonna fill gaps or use thickened epoxy you need to paint regular epoxy over that area first so it soaks in and so the wood wont suck the epoxy from you mixture of wood flour and epoxy
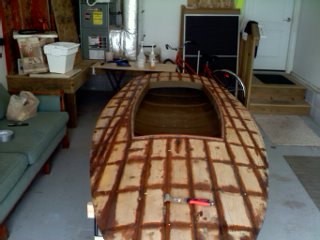
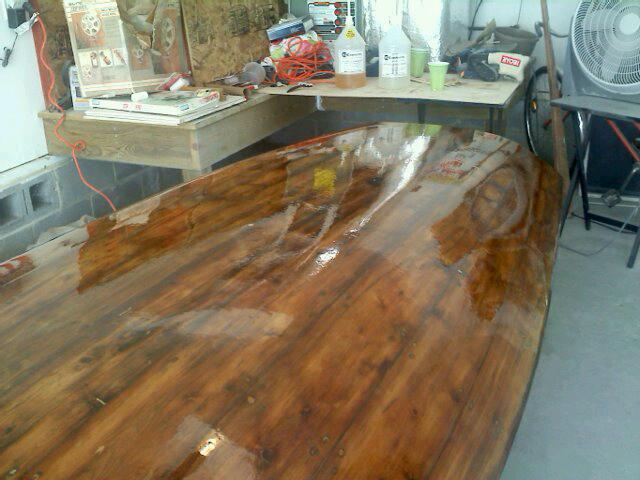
Here you see that I filled all the gaps and filled over all the screw holes so everything is even or as they call it (fair) I did this on the deck and hull
After i got everything filled I covered the deck and hull in a coat of epoxy I used a small paint roller to roll the epoxy on. I did this so that everything would have about the same hardness for sanding. If I didn't do this, when I went to sand over the thickened epoxy the wood (cedar) around the thickened epoxy would sand faster because its a lot softer then the hardened epoxy and I would have high and low spots all over. so with a coat on the deck and hull I can sand everything to make it nice and smooth and prep for glassing.
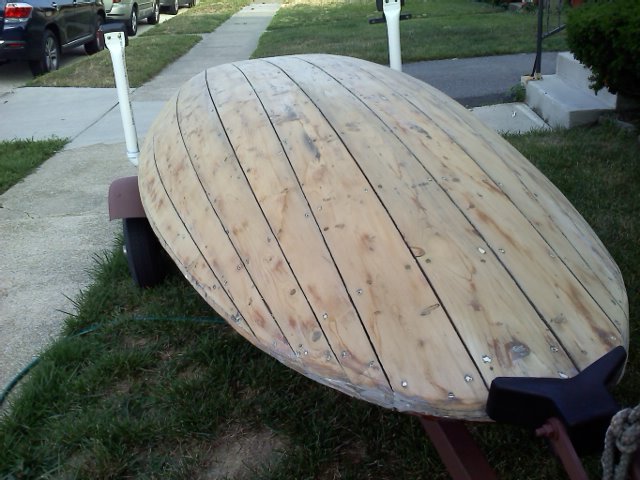
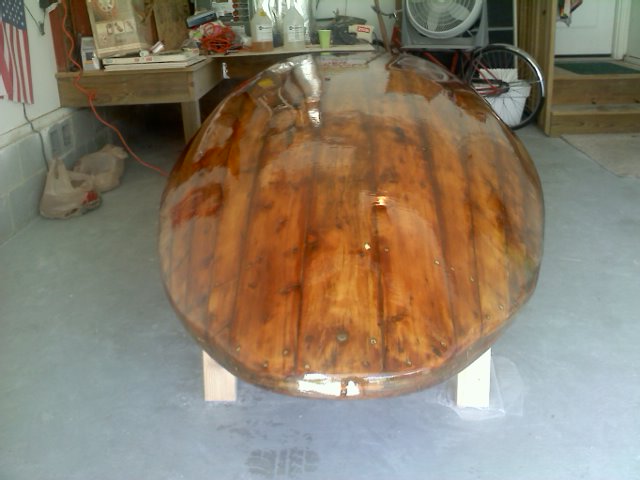
Here you see where i sanded the hull that was covered in epoxy until there where no high and low spots and everything is this couldy color. It is easy to find low spots as they stay shinny because the sander is not hitting them. You can go over these spots with thickened epoxy again then sand again till your hull looks like this.

At this time you are ready for glassing. You can do either the deck or hull first. I did the deck first. I did the deck in 4 pieces. I did a front deck, back deck, and one piece on each side of the cockpit. It is a good idea to dry fit everything before hand.

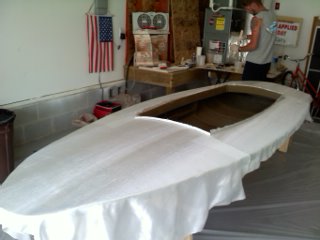
With the glass cloth in place it was time to mix up some epoxy and wet out the glass. For the reglassing I used 6oz fiberglass cloth and i used uscomposited medium cure epoxy. With the help of a friend we would mix up batches of epoxy in red solo cups and pour in over the cloth and spread it out with bondo squeeges. The trick is to use just enough epoxy to fill the weave of the cloth. If you use to much epoxy the glass will float on top of the epoxy and not bond to the wood like it should. After the first coat of epoxy is down and the glass is wet out I let that set up so it was still tacky to the touch and went back over with 3 more coats of epoxy waiting about 2 hours between each coat to let each coat tack up a bit. I put each additional coat on with a little paint roller. While the epoxy of each coat was still wet i would use a 4 inch dry paint brush and drag lightly up and down the whole deck to pop any air bubbles that may have been in the wet epoxy. I then waited about 4 to 5 days for the glass and epoxy to have enough time to fully cure.
With the deck glassing all done it was time for the hull to be done in the same way. the only change i did for the hull was, I did 2 layers of 6oz glass on the hull for added protection. This was a bit tricky because you need to get the 2nd layer of colth down while the first layer is still tacky. This way you have a good bond and you dond have to sand between each coat/later. It took a little work and some finesse to get the 2nd layer smooth on top of a tackey layer. Once I got the 2nd layer nice and smooth it was the same process of wetting out the glass and spreading it around with the squeeges. I also added 3 more coats of epoxy allowing about 2 hours between coats for each coat to set up a bit. this whole process took about 12 hours most of that time was drying time. Like the deck I let the hull dry for about 5 days in the summer heat
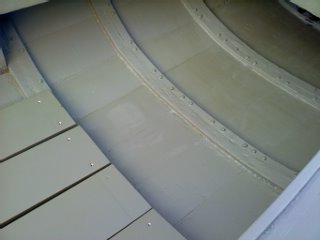
Now that both the deck and hull were reglassed I needed to tie the glass of both together and I wanted to reinforce the feather edge for the times i bump into docks or the pilings at the ramp so I sanded the edge all the way around the whole sneakbox and used 6 inch 9oz cloth tape and feathered in into the deck and hull and added 2 more coats of epoxy to the taped area to keep everything smooth.
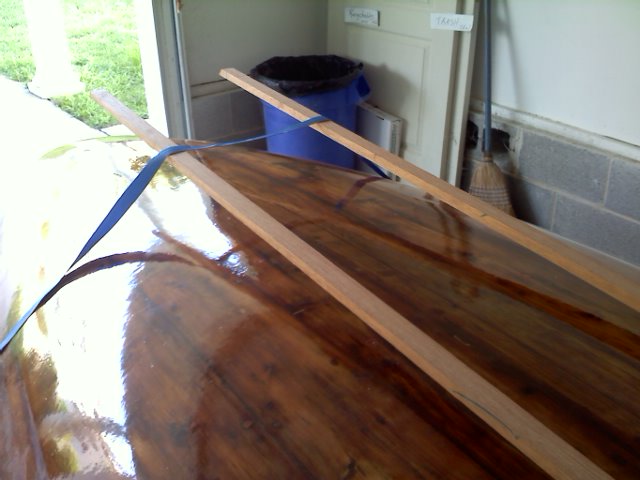
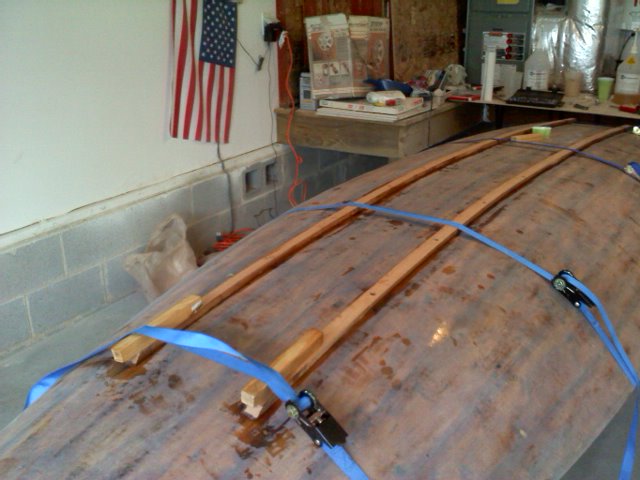
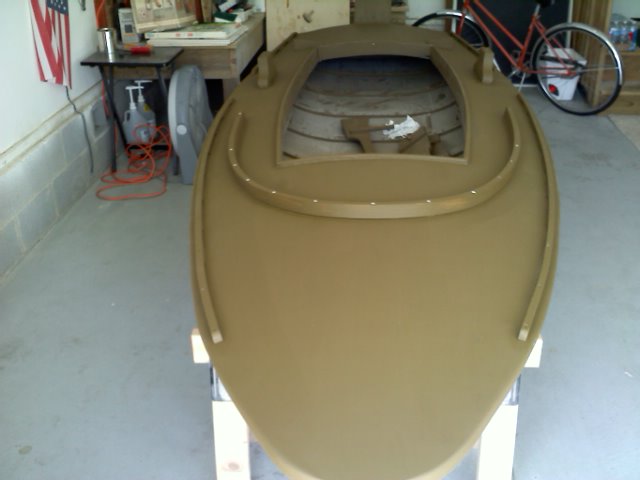
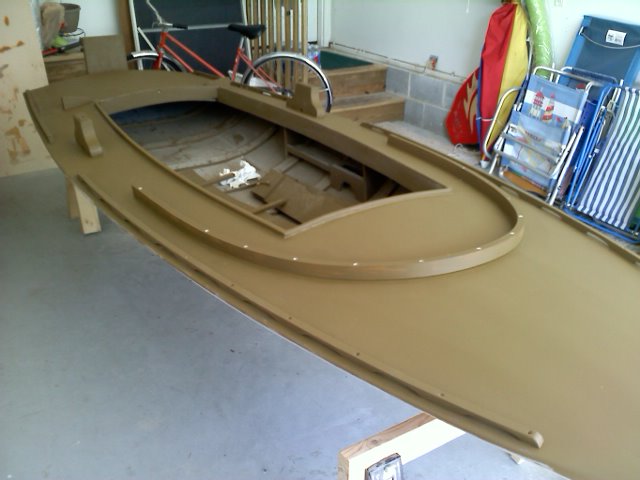
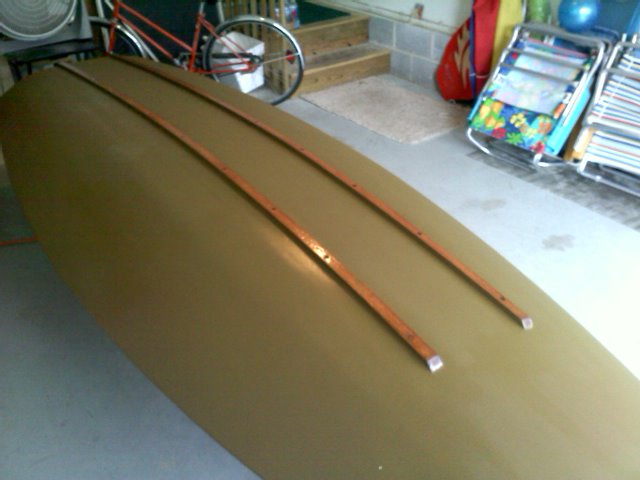
Now that the glassing was done it was time to put the hardware and other things on the sneakbox like ice runners, motorboard, decoy racks, oar locks. I started in the hull as it only had the ice runners. The way i wanted to do this was to through bolt the runners into each frame/rib and also use thickened epoxy as a glue. I used mahogany for the runners I ripped 2 peices on the table saw they were 3/4in X 1 1/2in. Once I got everything lined up I drilled my holes beinging careful to hit center on the ribs. One thing to make sure you do is to sand any place you are gonna put any hardware and before paintinf it will give a better bond. I used 1/4inch stainless bolts. I mixed up some thickened epoxy and using 4 ratchet straps I got the ice runners epoxied and bolted in place. Once the epoxy was dried I remover the straps. I went back and filled in all the bolt holes with epoxy and sanded smooth then put 2 coats of epoxy over each runner for added protection. Then I put 1/8 thick 1 inch wide aluminum stripes over the wood to protect the wood.
Now the hull was done and it was time to flip her over and start the deck hardware. I started with the oar locks I bolted them down with 1/4in stainless bolts and epoxied them down aswell.
Next was to add the decoy racks, motorboard, and grass rails. All of these were bolted with stainless steel fasteners and epoxy.

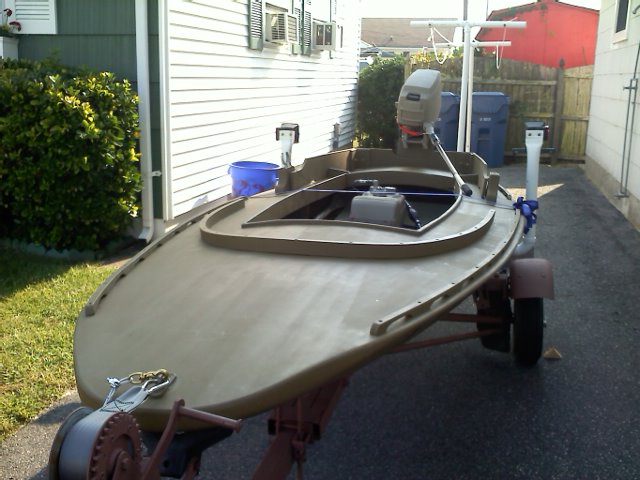
here it is really starting to look like a sneakbox.
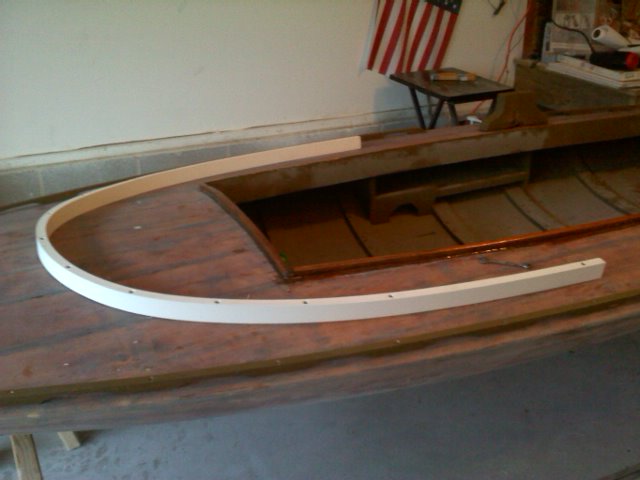
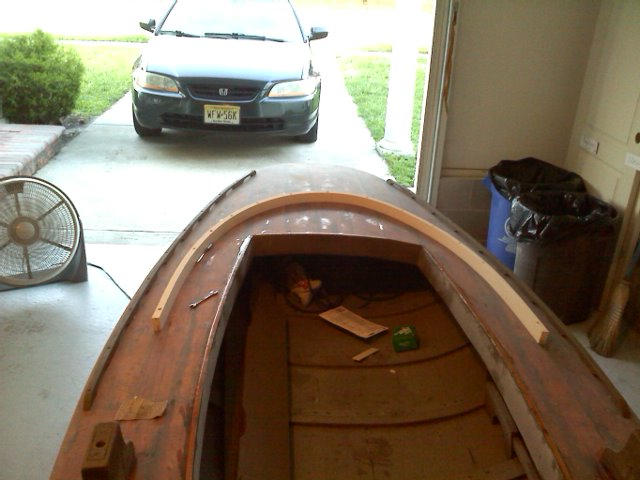
The last thing to add to the deck was the coaming for the dodger. For this I used aztek PVC plastic. I used this for a few reasons 1 it will never rot 2 it took the bend really easy 3 it is very easy to work with great stuff. To attach this I used stainless screws and bedded the coaming with black 3M 5200
Now she was ready for some paint I used parkers duck boat paint in the marsh grass color.
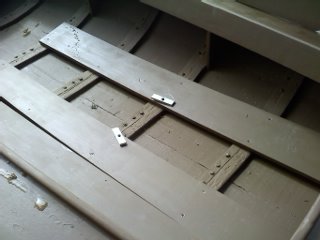
Next I added the floor boards to the inside. For this I used cedar that was 1/2in thick and 5in wide I made one floor board removable. I also made the foward 20inches of the floor removable so I could get the gas tank in and out from under the foward deck. You can see the removable section in the pictures. I screwed the floor boards down with stainless screws and made a little turn button to hold the one removable floor board in. So I can remove the one board to sponge out water and clean under the floor if need be.

here the one removable floorboard is removed and you can see the turn buttons
Now it was time to mount the motor, get some fresh gas, and get this baby wet.
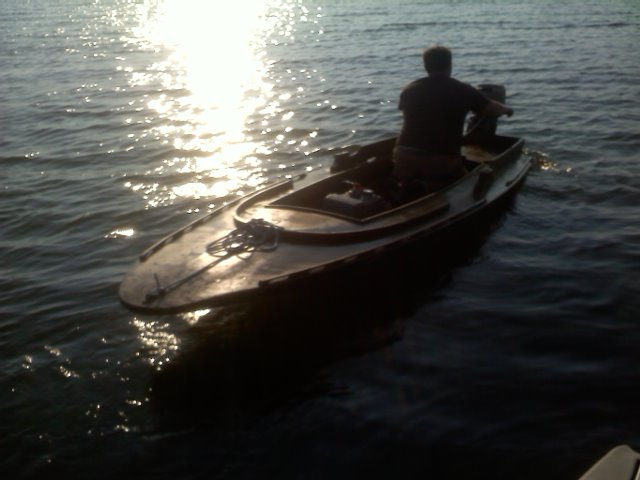
This made all the hard work worth it in the end.
Davey I hope this will help with content for the site.
I had spent a good bit of time looking for the right sneakbox that I wanted to rebuild. I picked this one because it was a classic Barnegat Bay Sneakbox and had a large cockpit and didn't have any wood rot. Here are a few pictures of what the sneakbox looked like when I brought it home
In this picture you can see that the box was in rough shape. It had that ugly block on the bow. It was painted bright red at one time you can see this on the far oarlock as the paint is chipping and red is showing through.
In this picture you can see that the motorboard was offset to one side. It wasn't set up as a sailer so I am not sure why it was off set. This was something I wanted to change for sure.
At first I was going to just paint and do minor repairs and hunt it that way the first season then reglass. so I changed the motorboard and painted it a marsh grass color. As time went on the glass was delaminating more in bigger spots and didn't wanna hunt the sneakbox this way.
At this point I knew it was time to dig in and get started I knew I wanted to reglass the whole sneakbox. It was glassed with polyester resin and poly resin doesn't stick to wood very well. The glass had started to delaminate in some spots. I wanted to reglass with epoxy and glass cloth. I started to remove the old glass with a razor knife by slicing the glass and pulling it off with vise grips. In this picture you can see the glass I pulled off the back deck.
Here you can see the glass coming off in big chunks. It was crazy how easy the old poly resin and glass pulled off. some places were harder to remover the glass like around corners and where the glass and cloth was overlaped. For this I found a heat gun and a 5 in 1 scraper worked best. Don't be afraid of gouging or dinging the wood as sanding and fairing will fill in these spots.
Next was to sand off all the residue left from the resin and sand down to good clean wood. sanding is by far the suckiest and most time comsuming part of a wood boat rebuild. I used a random orbital sander and a belt sander for that hard spots.
Removing the old ice runners was a little hard as they were through bolted and glassed over. When I got them off it was time for more sanding.
These pictures you can see the boat is all sanded down to nice clean wood and ready for all the gaps to be filled with an epoxy and wood flour mix. I would mix this to a peanut butter thickness so it will not run. I would use a paper plate to hold the mix while I would fill the gaps in the planks.
Anytime you are gonna fill gaps or use thickened epoxy you need to paint regular epoxy over that area first so it soaks in and so the wood wont suck the epoxy from you mixture of wood flour and epoxy
Here you see that I filled all the gaps and filled over all the screw holes so everything is even or as they call it (fair) I did this on the deck and hull
After i got everything filled I covered the deck and hull in a coat of epoxy I used a small paint roller to roll the epoxy on. I did this so that everything would have about the same hardness for sanding. If I didn't do this, when I went to sand over the thickened epoxy the wood (cedar) around the thickened epoxy would sand faster because its a lot softer then the hardened epoxy and I would have high and low spots all over. so with a coat on the deck and hull I can sand everything to make it nice and smooth and prep for glassing.
Here you see where i sanded the hull that was covered in epoxy until there where no high and low spots and everything is this couldy color. It is easy to find low spots as they stay shinny because the sander is not hitting them. You can go over these spots with thickened epoxy again then sand again till your hull looks like this.
At this time you are ready for glassing. You can do either the deck or hull first. I did the deck first. I did the deck in 4 pieces. I did a front deck, back deck, and one piece on each side of the cockpit. It is a good idea to dry fit everything before hand.
With the glass cloth in place it was time to mix up some epoxy and wet out the glass. For the reglassing I used 6oz fiberglass cloth and i used uscomposited medium cure epoxy. With the help of a friend we would mix up batches of epoxy in red solo cups and pour in over the cloth and spread it out with bondo squeeges. The trick is to use just enough epoxy to fill the weave of the cloth. If you use to much epoxy the glass will float on top of the epoxy and not bond to the wood like it should. After the first coat of epoxy is down and the glass is wet out I let that set up so it was still tacky to the touch and went back over with 3 more coats of epoxy waiting about 2 hours between each coat to let each coat tack up a bit. I put each additional coat on with a little paint roller. While the epoxy of each coat was still wet i would use a 4 inch dry paint brush and drag lightly up and down the whole deck to pop any air bubbles that may have been in the wet epoxy. I then waited about 4 to 5 days for the glass and epoxy to have enough time to fully cure.
With the deck glassing all done it was time for the hull to be done in the same way. the only change i did for the hull was, I did 2 layers of 6oz glass on the hull for added protection. This was a bit tricky because you need to get the 2nd layer of colth down while the first layer is still tacky. This way you have a good bond and you dond have to sand between each coat/later. It took a little work and some finesse to get the 2nd layer smooth on top of a tackey layer. Once I got the 2nd layer nice and smooth it was the same process of wetting out the glass and spreading it around with the squeeges. I also added 3 more coats of epoxy allowing about 2 hours between coats for each coat to set up a bit. this whole process took about 12 hours most of that time was drying time. Like the deck I let the hull dry for about 5 days in the summer heat
Now that both the deck and hull were reglassed I needed to tie the glass of both together and I wanted to reinforce the feather edge for the times i bump into docks or the pilings at the ramp so I sanded the edge all the way around the whole sneakbox and used 6 inch 9oz cloth tape and feathered in into the deck and hull and added 2 more coats of epoxy to the taped area to keep everything smooth.
Now that the glassing was done it was time to put the hardware and other things on the sneakbox like ice runners, motorboard, decoy racks, oar locks. I started in the hull as it only had the ice runners. The way i wanted to do this was to through bolt the runners into each frame/rib and also use thickened epoxy as a glue. I used mahogany for the runners I ripped 2 peices on the table saw they were 3/4in X 1 1/2in. Once I got everything lined up I drilled my holes beinging careful to hit center on the ribs. One thing to make sure you do is to sand any place you are gonna put any hardware and before paintinf it will give a better bond. I used 1/4inch stainless bolts. I mixed up some thickened epoxy and using 4 ratchet straps I got the ice runners epoxied and bolted in place. Once the epoxy was dried I remover the straps. I went back and filled in all the bolt holes with epoxy and sanded smooth then put 2 coats of epoxy over each runner for added protection. Then I put 1/8 thick 1 inch wide aluminum stripes over the wood to protect the wood.
Now the hull was done and it was time to flip her over and start the deck hardware. I started with the oar locks I bolted them down with 1/4in stainless bolts and epoxied them down aswell.
Next was to add the decoy racks, motorboard, and grass rails. All of these were bolted with stainless steel fasteners and epoxy.
here it is really starting to look like a sneakbox.
The last thing to add to the deck was the coaming for the dodger. For this I used aztek PVC plastic. I used this for a few reasons 1 it will never rot 2 it took the bend really easy 3 it is very easy to work with great stuff. To attach this I used stainless screws and bedded the coaming with black 3M 5200
Now she was ready for some paint I used parkers duck boat paint in the marsh grass color.
Next I added the floor boards to the inside. For this I used cedar that was 1/2in thick and 5in wide I made one floor board removable. I also made the foward 20inches of the floor removable so I could get the gas tank in and out from under the foward deck. You can see the removable section in the pictures. I screwed the floor boards down with stainless screws and made a little turn button to hold the one removable floor board in. So I can remove the one board to sponge out water and clean under the floor if need be.
here the one removable floorboard is removed and you can see the turn buttons
Now it was time to mount the motor, get some fresh gas, and get this baby wet.
This made all the hard work worth it in the end.
Davey I hope this will help with content for the site.

Chris S.- Moderator

- Posts : 210
Join date : 2011-12-10
Location : south jersey
Re: My sneakbox rebuild *TUTORIAL*
![]() Davey Welsh Thu Aug 16, 2012 8:15 am
Davey Welsh Thu Aug 16, 2012 8:15 am
SUPER JOB on this tutorial Chris! Hopefully guys find it useful. You did a great job the restore.

Davey Welsh- Owner/Founder

- Posts : 711
Join date : 2011-12-10
Location : New Jersey -

Re: My sneakbox rebuild *TUTORIAL*
![]() Russell Vrhovac Thu Aug 16, 2012 11:42 am
Russell Vrhovac Thu Aug 16, 2012 11:42 am
Nice work Chris!
Now I have to build another one, and find a place to hide another boat from my wife
Now I have to build another one, and find a place to hide another boat from my wife

Russell Vrhovac- Regular Gunner

- Posts : 144
Join date : 2012-01-11
Location : Chesapeake, VA
Re: My sneakbox rebuild *TUTORIAL*
![]() RickC Fri Aug 17, 2012 12:49 am
RickC Fri Aug 17, 2012 12:49 am
Great tutorial thanks for posting this for everyone.
RickC- Amatuer Gunner

- Posts : 39
Join date : 2012-05-20
Re: My sneakbox rebuild *TUTORIAL*
![]() Rob Robertson Fri Aug 17, 2012 9:52 am
Rob Robertson Fri Aug 17, 2012 9:52 am
WOW, Thread of the Year right there. Great Job and thanks for posting.

Rob Robertson- Amatuer Gunner
- Posts : 43
Join date : 2012-04-23
Re: My sneakbox rebuild *TUTORIAL*
![]() Rick Godsey Fri Aug 17, 2012 6:44 pm
Rick Godsey Fri Aug 17, 2012 6:44 pm
Great job on her Chris. Almost hate to see the boat get banged up out there, But we all can see you know how to take care of it.
Rick
Rick

Rick Godsey- Regular Gunner
- Posts : 194
Join date : 2012-01-15
Location : Dutchess County NY
Re: My sneakbox rebuild *TUTORIAL*
![]() Chris S. Sat Aug 18, 2012 1:33 am
Chris S. Sat Aug 18, 2012 1:33 am
Rick Godsey wrote:Great job on her Chris. Almost hate to see the boat get banged up out there, But we all can see you know how to take care of it.
Rick
Thanks for the kind words fellas. I am doing some work to the sneakbox now I am replacing the motorboard the one I put on was to low. When I took the old one off I cracked and pulled some glass off the transom. I was trying to break the hold of 3M 5200. So now I have a small glass repair and new motorboard to do.
Chris S.- Moderator
- Posts : 210
Join date : 2011-12-10
Location : south jersey
David "swampy" L- Moderator
- Posts : 162
Join date : 2011-12-11
Location : Central Jersey
Sticky?
![]() RickC Sun Aug 19, 2012 7:02 pm
RickC Sun Aug 19, 2012 7:02 pm
IMHO I believe this thread is "Sticky" worthy, if it's done here.
RickC- Amatuer Gunner
- Posts : 39
Join date : 2012-05-20
Re: My sneakbox rebuild *TUTORIAL*
![]() Rjpereira Thu Apr 17, 2014 9:58 am
Rjpereira Thu Apr 17, 2014 9:58 am
Wow. Did I learn a lot. Won't hesitate to tackle a restoration myself using your tutorial!!!
Rjpereira- FNG

- Posts : 1
Join date : 2014-04-17
» Lets see your duck boat
» Off Season Agenda
» 2002 Estuary rebuild DONE!!!!
» sneakbox bow eye
» Sneakbox
» Off Season Agenda
» 2002 Estuary rebuild DONE!!!!
» sneakbox bow eye
» Sneakbox
Page 1 of 1
Permissions in this forum:
You cannot reply to topics in this forum|
|
|